Tutorials / Storage
SD card
A micro SD module on SPI that stores real files — they survive a restart, and you can eject the card to test your error handling.
- SD card
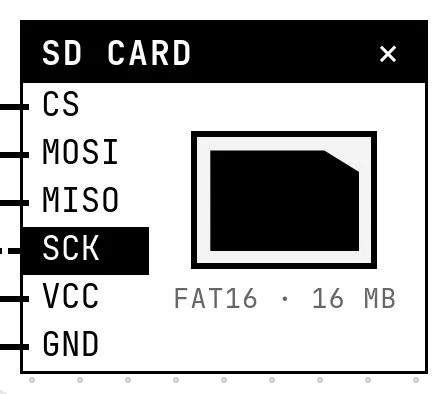
What it is
The micro SD module is the way a microcontroller keeps data when the power goes: logs, settings, images for a display. The card speaks SPI; the SD library mounts its file system and gives you open, read, write and directories, the way a computer would.
In the simulator
The block shows the socket with a card in it — a 16 MB card, already formatted (FAT16), with a small text file from the factory. The Card setting ejects it: with no card, SD.begin() returns false, which is the case your code must handle. What you write stays on the card between runs of the same project.
Pins
| Pin | What it is |
|---|---|
| CS | chip select — to a GPIO (5 in the example; whatever you pass to SD.begin()) |
| MOSI | data to the card — to GPIO 23 (VSPI) or 13 (HSPI) |
| MISO | data from the card — to GPIO 19 (VSPI) or 12 (HSPI) |
| SCK | clock — to GPIO 18 (VSPI) or 14 (HSPI) |
| VCC | power — to a 3V3 symbol |
| GND | ground — to a GND symbol |
Wiring
Build this circuit yourself: start a New project, add the parts from the catalog and wire them as in the table.
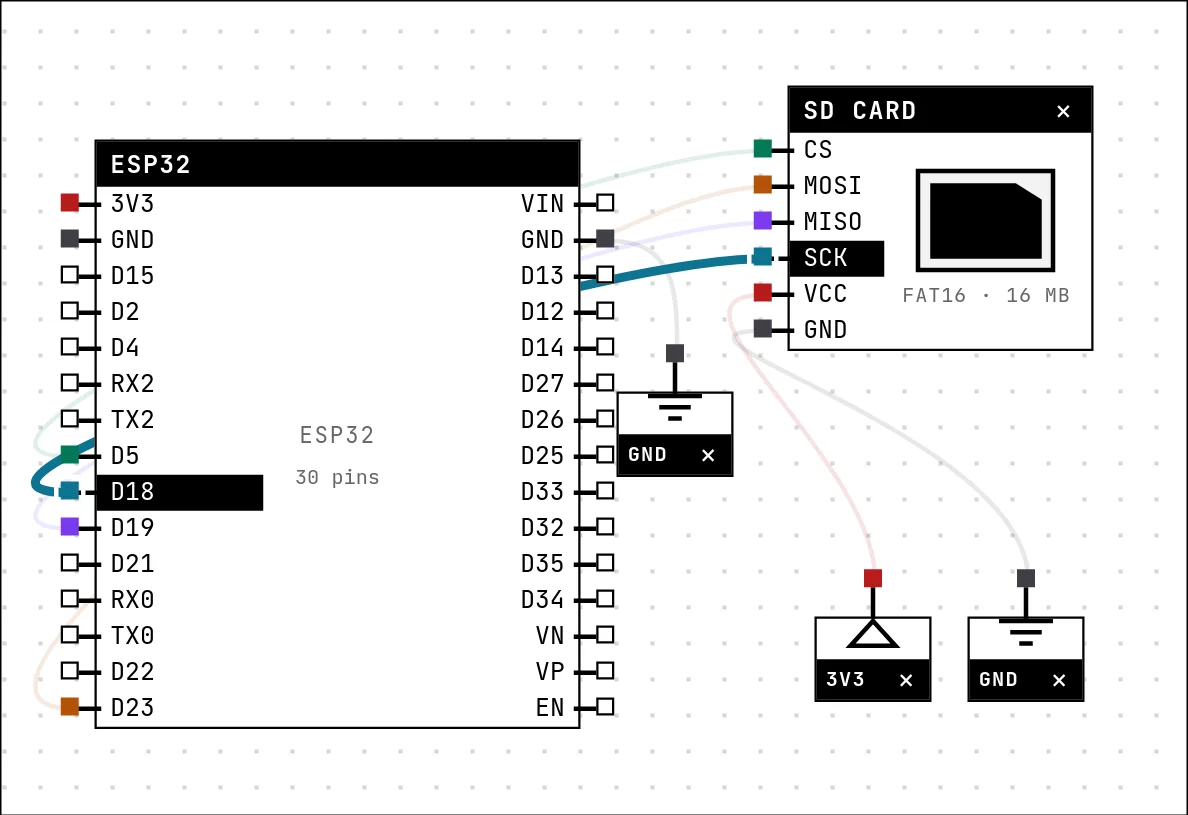
| SD card pin | Goes to |
|---|---|
| CS | D5 on the board (GPIO 5) |
| MOSI | D23 on the board (GPIO 23) |
| MISO | D19 on the board (GPIO 19) |
| SCK | D18 on the board (GPIO 18) |
| VCC | a 3V3 symbol |
| GND | a GND symbol |
Settings
Double-click the block's title bar to open its card, then the Settings tab. Changes apply to the running simulation right away.

| Setting | Accepts | Default | Notes |
|---|---|---|---|
| Card | Inserted · Ejected (no card) | Inserted | Eject it to test what your code does when the card is not there — SD.begin() returns false. |
Code
#include <Arduino.h>
#include <SPI.h>
#include <SD.h>

// The card talks SPI. On the ESP32 the default bus (VSPI) is SCK 18, MISO 19,
// MOSI 23 — the chip select is whatever GPIO you pass to SD.begin().
const int CS = 5;
int line = 0;

void setup() {
  Serial.begin(115200);
  delay(300);
  if (!SD.begin(CS)) {
    Serial.println("no card found — is it inserted? are the four SPI wires right?");
    for (;;) delay(1000);
  }
  Serial.printf("card ready: %llu MB\n", SD.cardSize() / (1024 * 1024));

  // the card comes formatted, with a file already on it
  File root = SD.open("/");
  for (File f = root.openNextFile(); f; f = root.openNextFile())
    Serial.printf("  %s  (%u bytes)\n", f.name(), (unsigned)f.size());
}

void loop() {
  // APPEND: each run adds lines to the same file — like a real logger
  File log = SD.open("/log.txt", FILE_APPEND);
  if (log) {
    log.printf("line %d at %lu ms\n", ++line, millis());
    log.close();
  }

  // read it all back, so you can see the file grow
  File back = SD.open("/log.txt");
  Serial.printf("--- /log.txt (%u bytes) ---\n", (unsigned)back.size());
  while (back.available()) Serial.write(back.read());
  back.close();
  delay(3000);
}
SD.begin(CS) mounts the card on the default bus (VSPI: 18, 19, 23). The sketch lists the root directory, then appends a line to /log.txt every three seconds and reads the whole file back — the logger pattern, with the file opened in FILE_APPEND mode.
Run it
Press Build and run. The first build of a project takes a while; after that, only what changed is rebuilt.
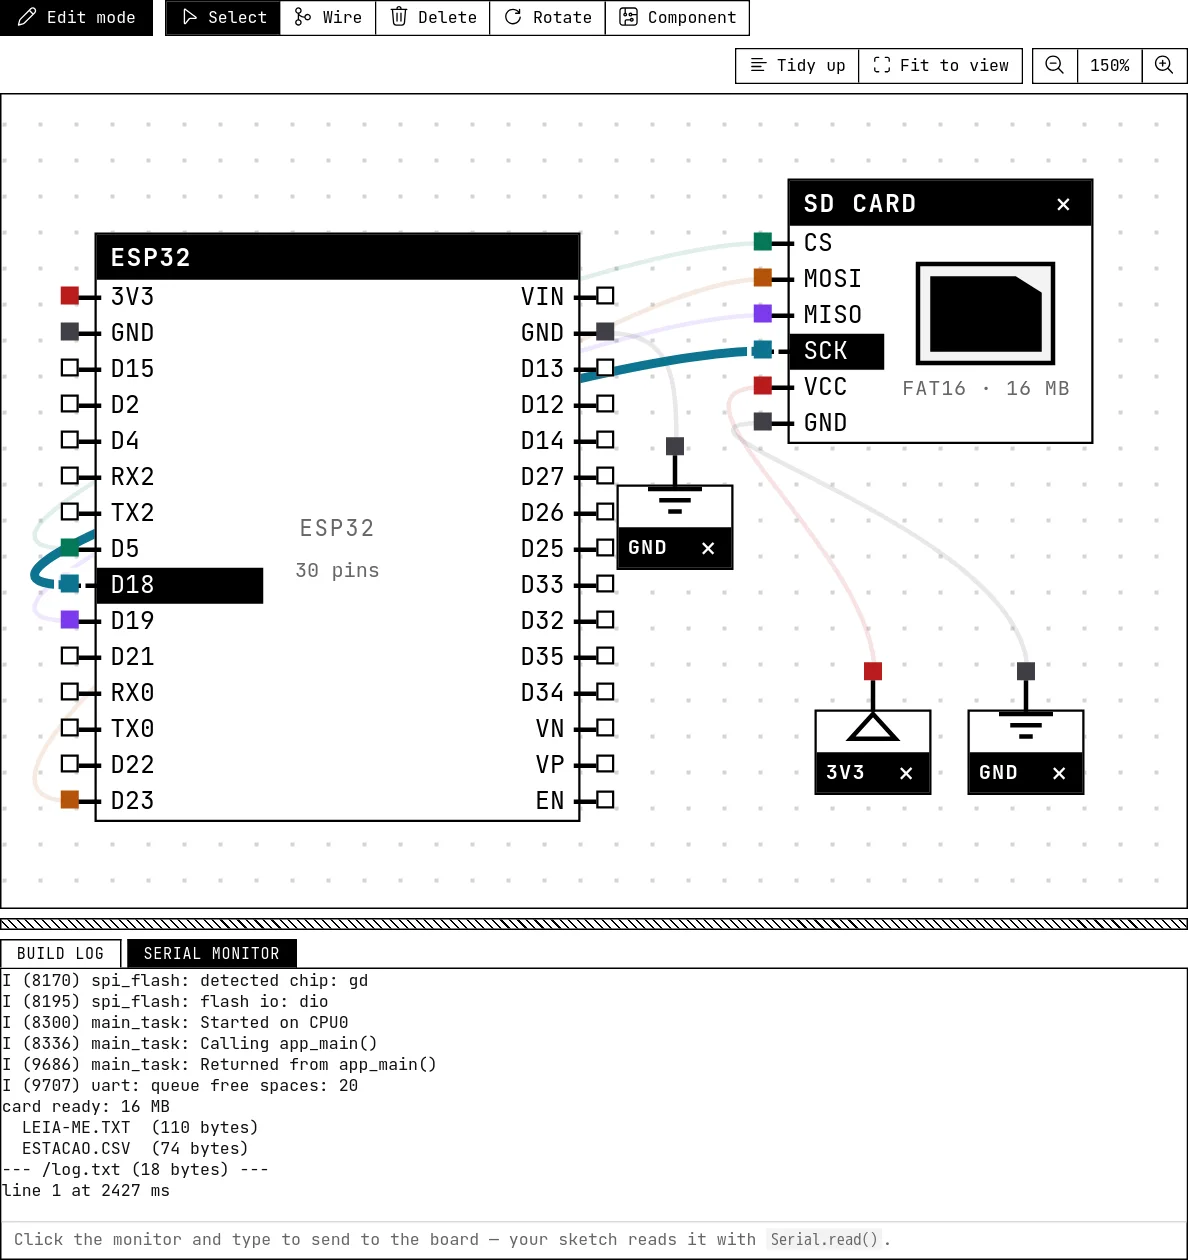
The serial monitor shows the card size, the factory file, and /log.txt growing by one line per cycle. Press restart: the lines are still there, and the count continues from where the file was. Eject the card in Settings and restart: “no card found”.
How the simulation models it
- The simulation emulates the card itself, at the SPI command level (CMD0, CMD8, ACMD41, CSD, CID, single and multiple block reads and writes, with the response delay a real card has), over an image of a formatted FAT16 volume. The library's own file system code runs unchanged.
- The image persists with the project's session on the server for as long as the session lives; it is not part of the downloaded project file.
- All four SPI wires plus CS must be wired for the module to join the bus; the message area lists what is missing.
Try this
- Write a CSV header on the first run only (check whether the file exists with
SD.exists()). - Read a number from
/config.txtat start-up and use it as the blink interval — a configuration file.
See also
- GPS receiver (NEO-6M) — A module that talks on its own: NMEA sentences on a serial port, once a second, decoded with TinyGPS++.
- Projects, files and examples — Where your work lives, how Save and Open work, files and folders in a project, the examples gallery and the keyboard shortcuts.
- ESP32 boards — Eight boards to choose from, pin by pin: which GPIOs reach the header, which are input-only, which have an ADC, and which must be left alone.